How to Crochet a Foundation Chain
How to Crochet a Foundation Chain: How to Crochet Lesson #7
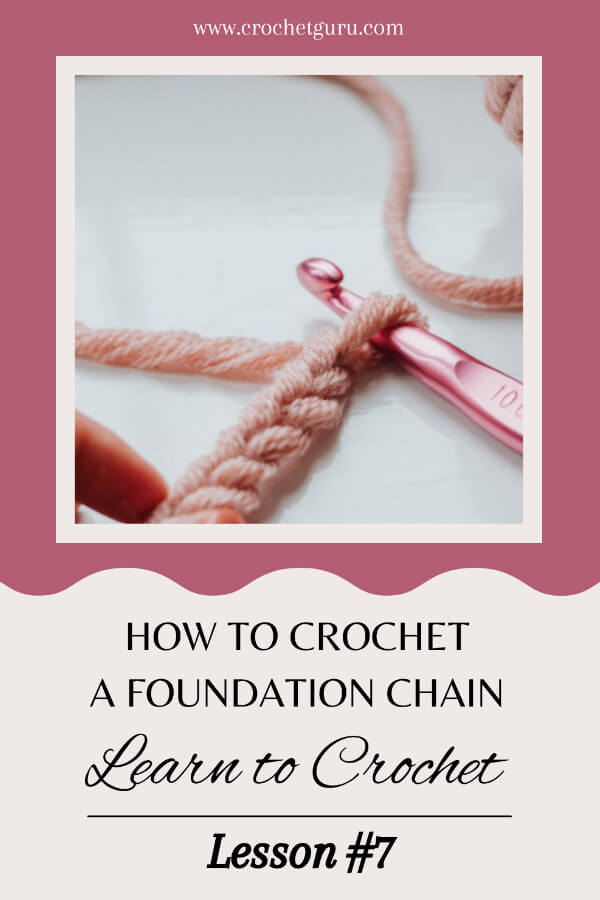
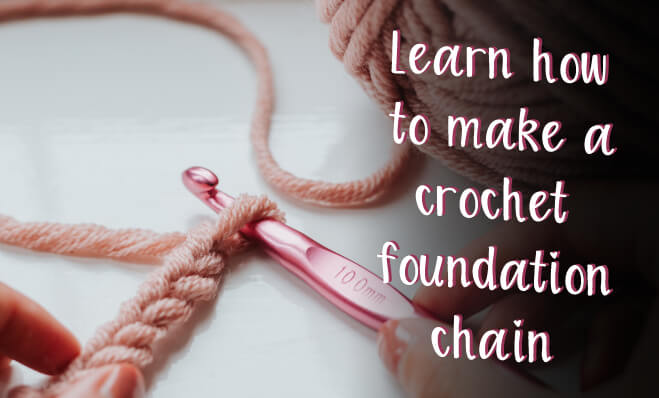
Learn how to crochet a foundation chain in this crochet lesson #7.
The Foundation Chain
A foundation chain is a series of chain stitches used as a starting point or base to build crochet stitches upon. Foundation chains are generally used for flat crochet projects such as blankets, dishcloths, and granny squares.
Note: It is essential to learn how to make a basic foundation chain to progress, build upon and create more crochet stitches.
To get all of my lessons on how to crochet, make sure to purchase a copy of my "Learn to Crochet With Me the Crochet Guru" Book!
After you buy the book, follow along with me as I guide you through the exciting journey of learning crochet! Click Here to Purchase My Book
How to Make a Foundation Chain
Step #1: Start by making a slip knot.
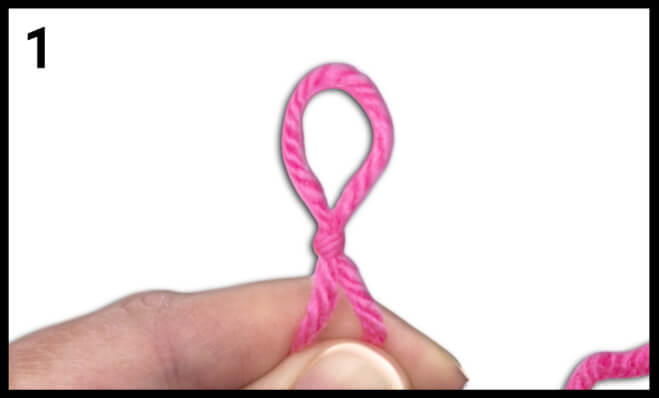
Step #2: Place the slip knot onto the shaft of the hook.
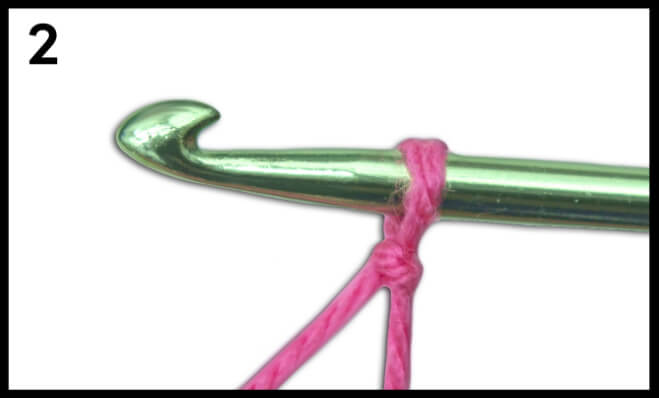
Step #3: Position the working yarn into your "yarn hand" using your preferred holding style.
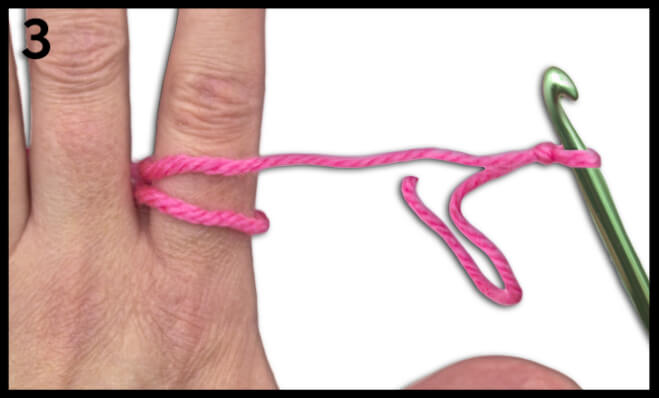
Step #4: Hold the tail end of the slip knot with your "yarn hand" by pulling the tail lightly between your thumb and middle finger.
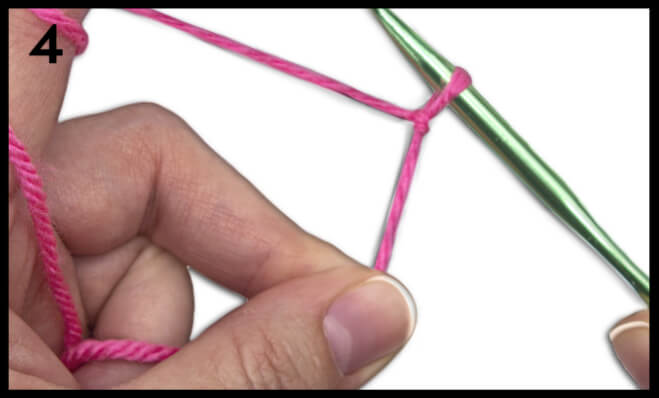
Step #5: Yarn over.
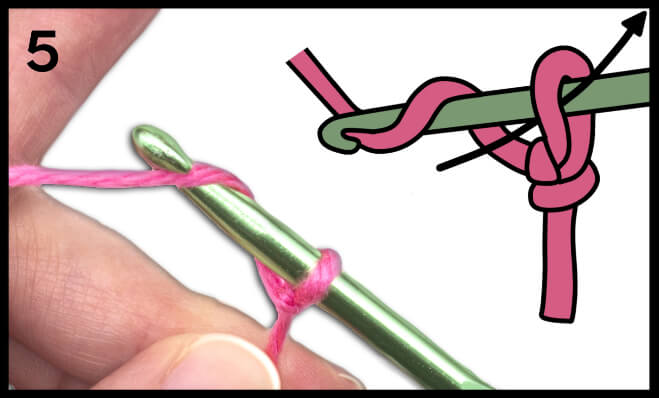
Step #6: Pull the yarn through the loop on your hook.
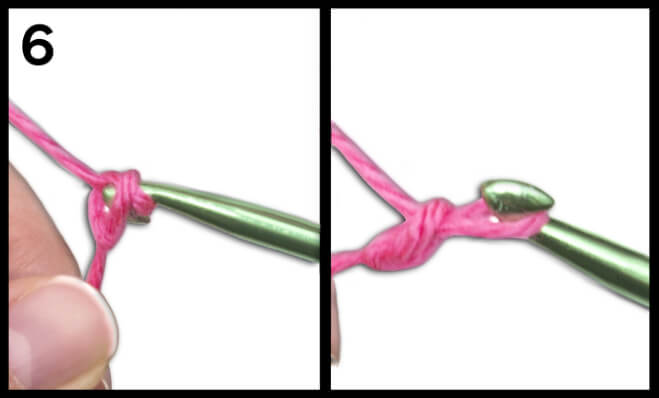
Step #7: Repeat steps 5 and 6 until you reach the number of chains desired.
The Parts of a Chain Stitch
A chain stitch is made up of three loops, and it is important to understand where each loop is located so that you will know where to place your crochet hook when creating more stitches.
Chain Stitches Are Made Up of Three Loops or Parts:
1. The top loop.
2. The bottom loop.
3. The ridge or bump.
Note: When looking at the parts of a chain, hold your chain horizontally. Your hook should still be attached to the foundation chain, and your yarn hand should hold the yarn’s tail end.
The Top Loop
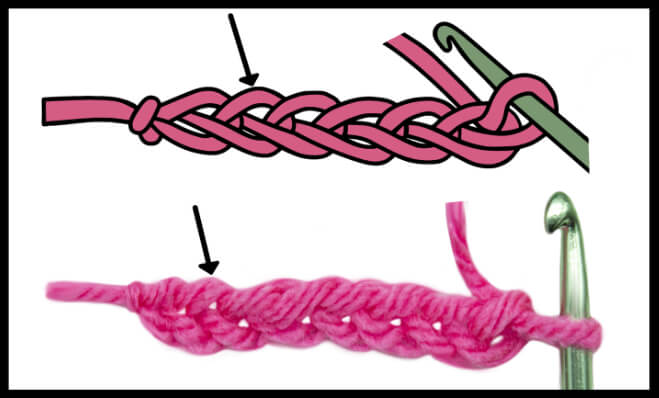
The top loop is the loop that is located on the top of a chain stitch.
Note: When a chain stitch or foundation chain is lying on a flat surface, the top loop will be located furthest away from you, and in this position, the “top loop” can also be called the “back loop.”
The Bottom Loop
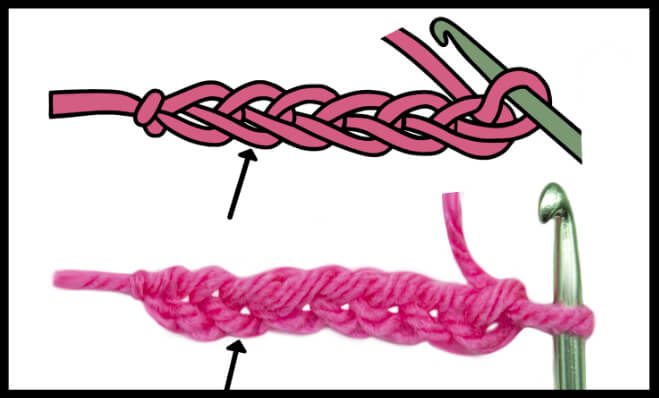
The bottom loop is the loop that is located on the bottom of a chain stitch.
Note: When a chain stitch or foundation chain is lying on a flat surface, the bottom loop will be located closest to you, and in this position, the “bottom loop” can also be called the “front loop.”
The Ridge or Bump
The ridge or bump loop is located on the backside or underneath the chain stitch. The ridge pushes the top two loops of the single crochet forward.
The ridge/bump can also be called the "third loop."
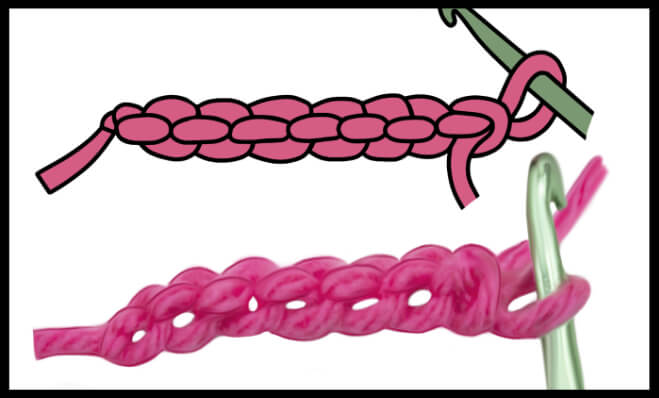
Counting Chain Stitches
Knowing how to count your chain stitches is important when determining whether you have added enough stitches onto your foundation chain. Remember, one chain stitch comprises one top loop, one bottom loop, and one ridge loop.
Important Note: The slip knot and the loop attached to your hook do not count as chain stitches.

How to Check the Tension of Your Foundation Chain
Follow these steps to ensure your foundation chain has the correct amount of tension.
1. Every chain stitch should be the same (even).
2. If you see holes or gaps in your chain stitches, your foundation chain is too loose.
3. If you cannot insert your hook into any of the loops of your chain stitches, your foundation chain is too tight.
Helpful Chaining Tips: How to Crochet a Foundation Chain
- As the foundation chain gets longer, continue to move your fingers up the chain to keep the right amount of control and tension on your work.
- Keep your hands relaxed as you move up the foundation chain.
- Do not try to tighten the chain stitches as you crochet. If the chain stitches are tight, it will be challenging to work stitches into them later.
To Do List: How to Make a Crochet Chain Stitch
1. Make a foundation chain by chaining 19 (ch 19).
2. Count each chain to ensure the number of chain you made is correct.
3. Familiarize yourself with the parts of a chain stitch.
4. Check and adjust your foundation chain's tension as needed.
Great Job! You Finished Lesson #7 - How to Make a Foundation Chain
Now Click Here to Go to Lesson #8 - How to Single Crochet
Pin This Post!
Save this Learn How to Crochet a Foundation Chain - Crochet Lesson #7 to your Pinterest boards so that you can come back to it later.
Discover the magic of crochet and learn how to create a strong foundation chain with ease. Our crochet lesson #7 teaches you how to create a base for your crochet projects. Step-by-step guide to creating a foundation chain Expert tips and tricks for mastering the technique Perfect for beginners Take your crochet skills to the next level Don't forget to save this Pin for later and use the hashtags. #crochetlesson #crochet101 #crochetfoundationchain
For more information on how to make a crochet foundation chain you can check out this post on how to chain stitch, by Treasurie.
Have Questions? Join My Crochet Guru Facebook Group!
I hope this article was helpful! If you have any additional questions, feel free to join my Crochet Guru Facebook Group. This group is for you to share pictures, ask questions, and help each other out!
